> For the complete documentation index, see [llms.txt](https://qwertystudio.gitbook.io/calysto/llms.txt). Markdown versions of documentation pages are available by appending `.md` to page URLs; this page is available as [Markdown](https://qwertystudio.gitbook.io/calysto/drawing-roads-rivers-lakes-and-biomes/automatic-audio-and-waterfall-beta.md).

# Automatic audio and waterfall (beta)

### Automated audio (rivers)

The second part of the tool is reserved for rivers only. It allows you to add audio along the river automatically. The audio is split into 3 areas decided by the slope of the river.

Calm water, running water, and waterfall.

The audio is also controlled by a database you can easily customize (more on that later).

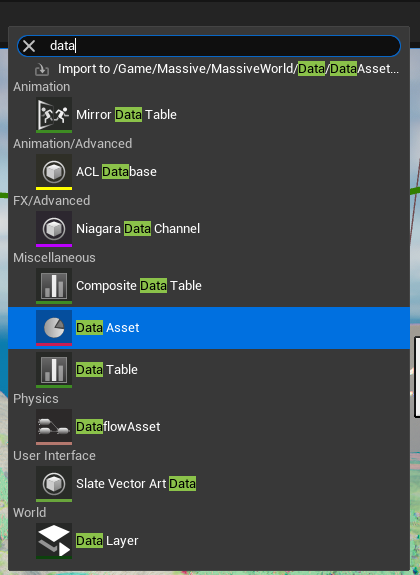
First, create a new data asset

<figure><img src="https://3223403327-files.gitbook.io/~/files/v0/b/gitbook-x-prod.appspot.com/o/spaces%2F5xsfjHEQXblHDG7WFyoC%2Fuploads%2F4fJBAc7JMy1FHHakoDlj%2Fimage.png?alt=media&amp;token=bef6b4de-ec4d-4002-a8e8-82b2b2bbc238" alt=""><figcaption></figcaption></figure>

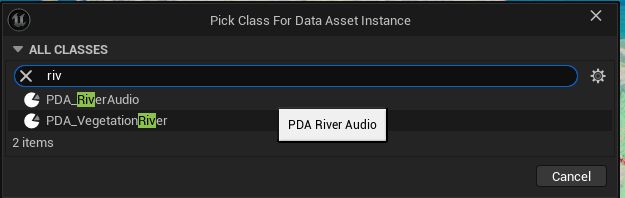
Then create a PDA\_RiverAudio

<figure><img src="https://3223403327-files.gitbook.io/~/files/v0/b/gitbook-x-prod.appspot.com/o/spaces%2F5xsfjHEQXblHDG7WFyoC%2Fuploads%2Fy3JiDYzg5FrFr9Vhwer2%2Fimage.png?alt=media&amp;token=aa61888f-4738-4173-bd26-8089c95256c5" alt=""><figcaption></figcaption></figure>

Once created you can fill the data with your audio and sound distance it can be heard

<div data-full-width="true"><figure><img src="https://3223403327-files.gitbook.io/~/files/v0/b/gitbook-x-prod.appspot.com/o/spaces%2F5xsfjHEQXblHDG7WFyoC%2Fuploads%2FbRkPkBm0Kp3RCkQanHUj%2Fimage.png?alt=media&amp;token=e581d692-9b4a-41aa-a97b-866b4b0681cb" alt=""><figcaption></figcaption></figure></div>

Inside the drawing tool, you can then select River and add your audio database.

<figure><img src="https://3223403327-files.gitbook.io/~/files/v0/b/gitbook-x-prod.appspot.com/o/spaces%2F5xsfjHEQXblHDG7WFyoC%2Fuploads%2FdbNSX5Ms7AaUqgb2mrgF%2Fimage.png?alt=media&amp;token=a79200fb-82d4-4ff2-9458-d60902e24f72" alt=""><figcaption></figcaption></figure>

Add Audio: Set to true to add audio

River Audio: Add here your own data for the audio

Following the 10/30 that means...

### Automated audio (lakes)

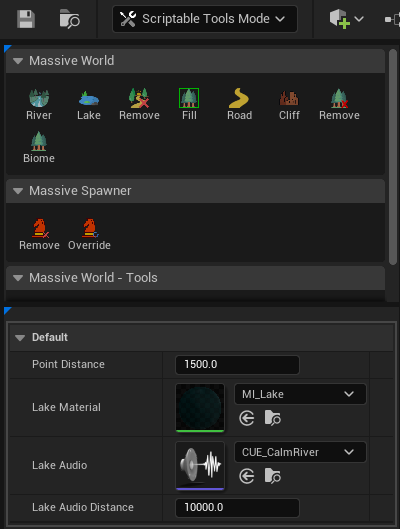
Lakes only have one audio near the edge and don't have slopes so the workflow is simplified. You only need to set the audio distance and the audio you want to use.

<div data-full-width="true"><figure><img src="https://3223403327-files.gitbook.io/~/files/v0/b/gitbook-x-prod.appspot.com/o/spaces%2F5xsfjHEQXblHDG7WFyoC%2Fuploads%2F9eUyTE3s7MqixATjTnnG%2Fimage.png?alt=media&amp;token=b0b81729-794e-4143-8516-12265be5ef2f" alt=""><figcaption></figcaption></figure></div>

### Waterfall Fx

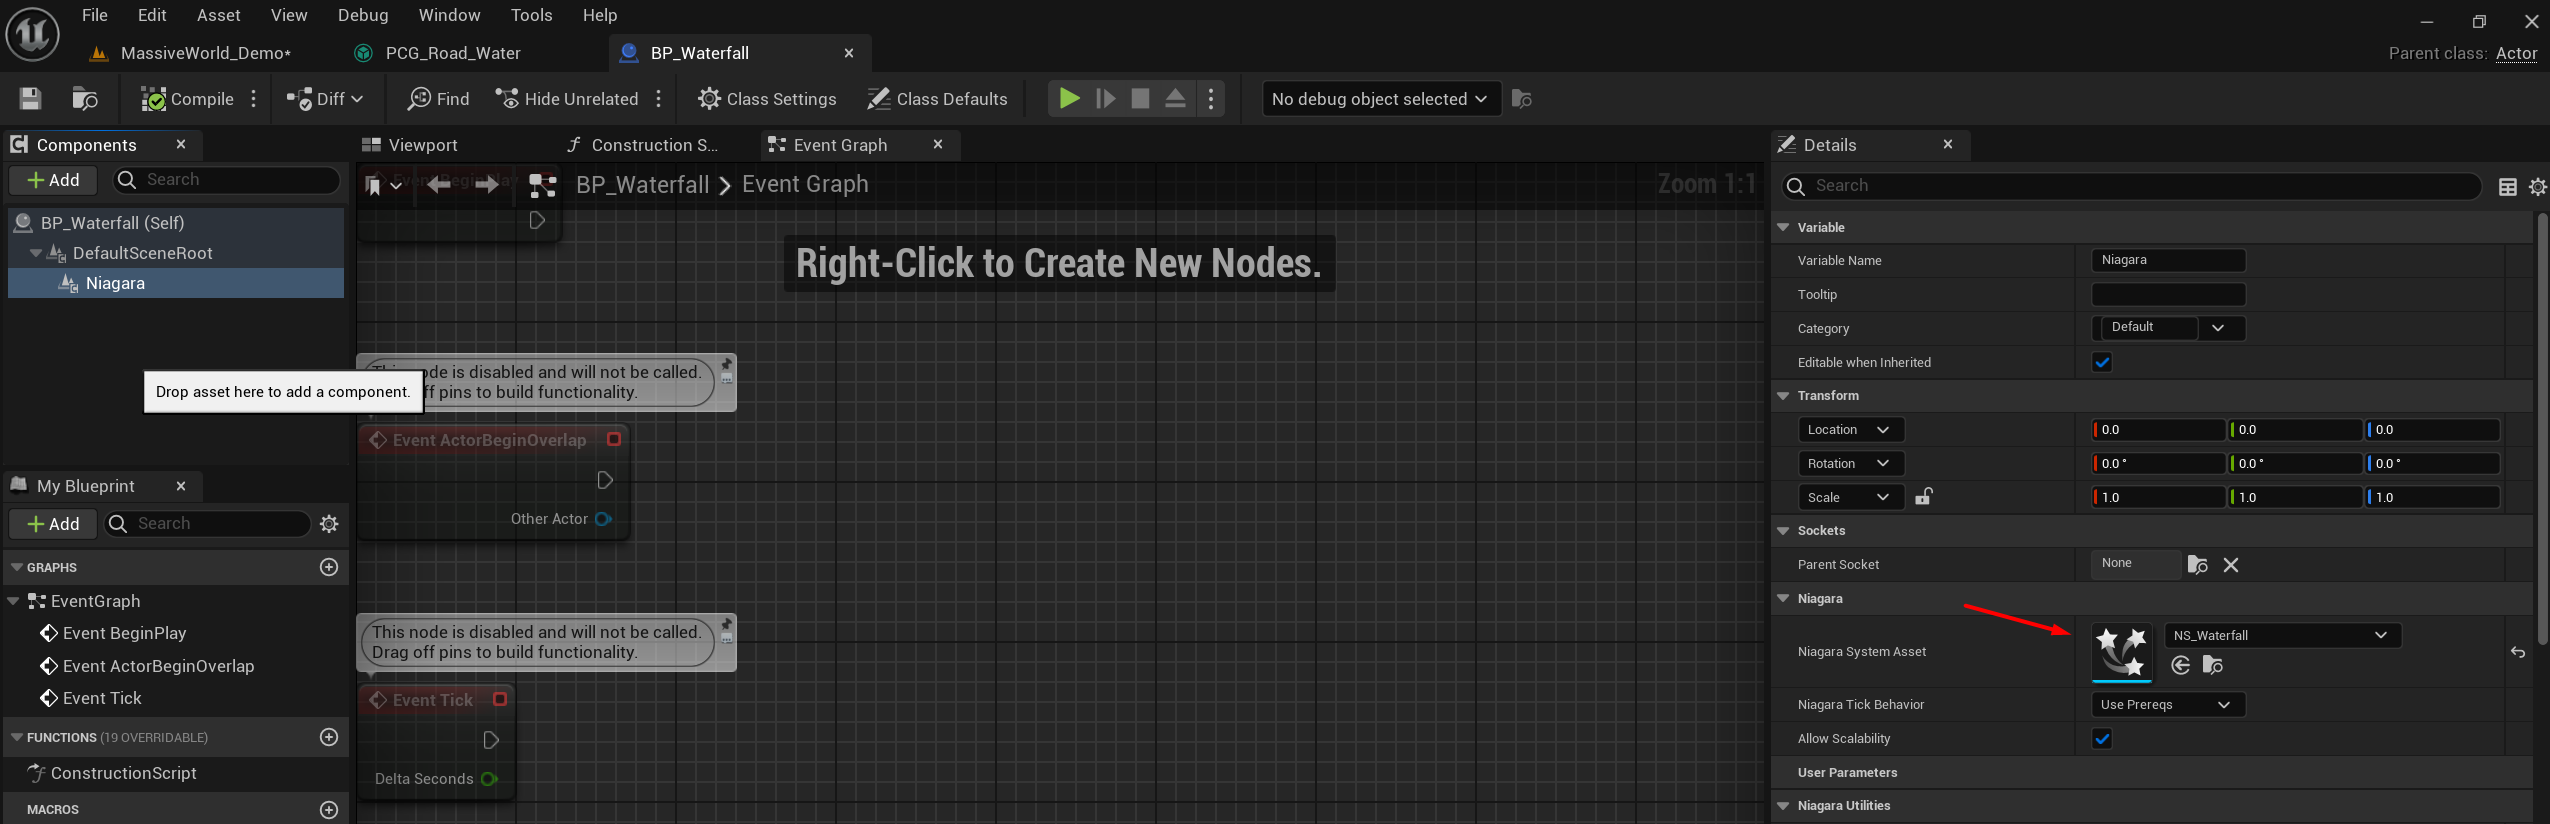
Inside BP\_Waterfall you can switch the effect to use any of your effects.

<figure><img src="https://3223403327-files.gitbook.io/~/files/v0/b/gitbook-x-prod.appspot.com/o/spaces%2F5xsfjHEQXblHDG7WFyoC%2Fuploads%2F5KS9gbjlULCV6G6Lyxzx%2Fimage.png?alt=media&amp;token=721e5f18-92fe-4f71-9e90-d90f5aacf369" alt=""><figcaption></figcaption></figure>

Note that the current example uses Niagara but you can also remove it and switch to the old Fx system.

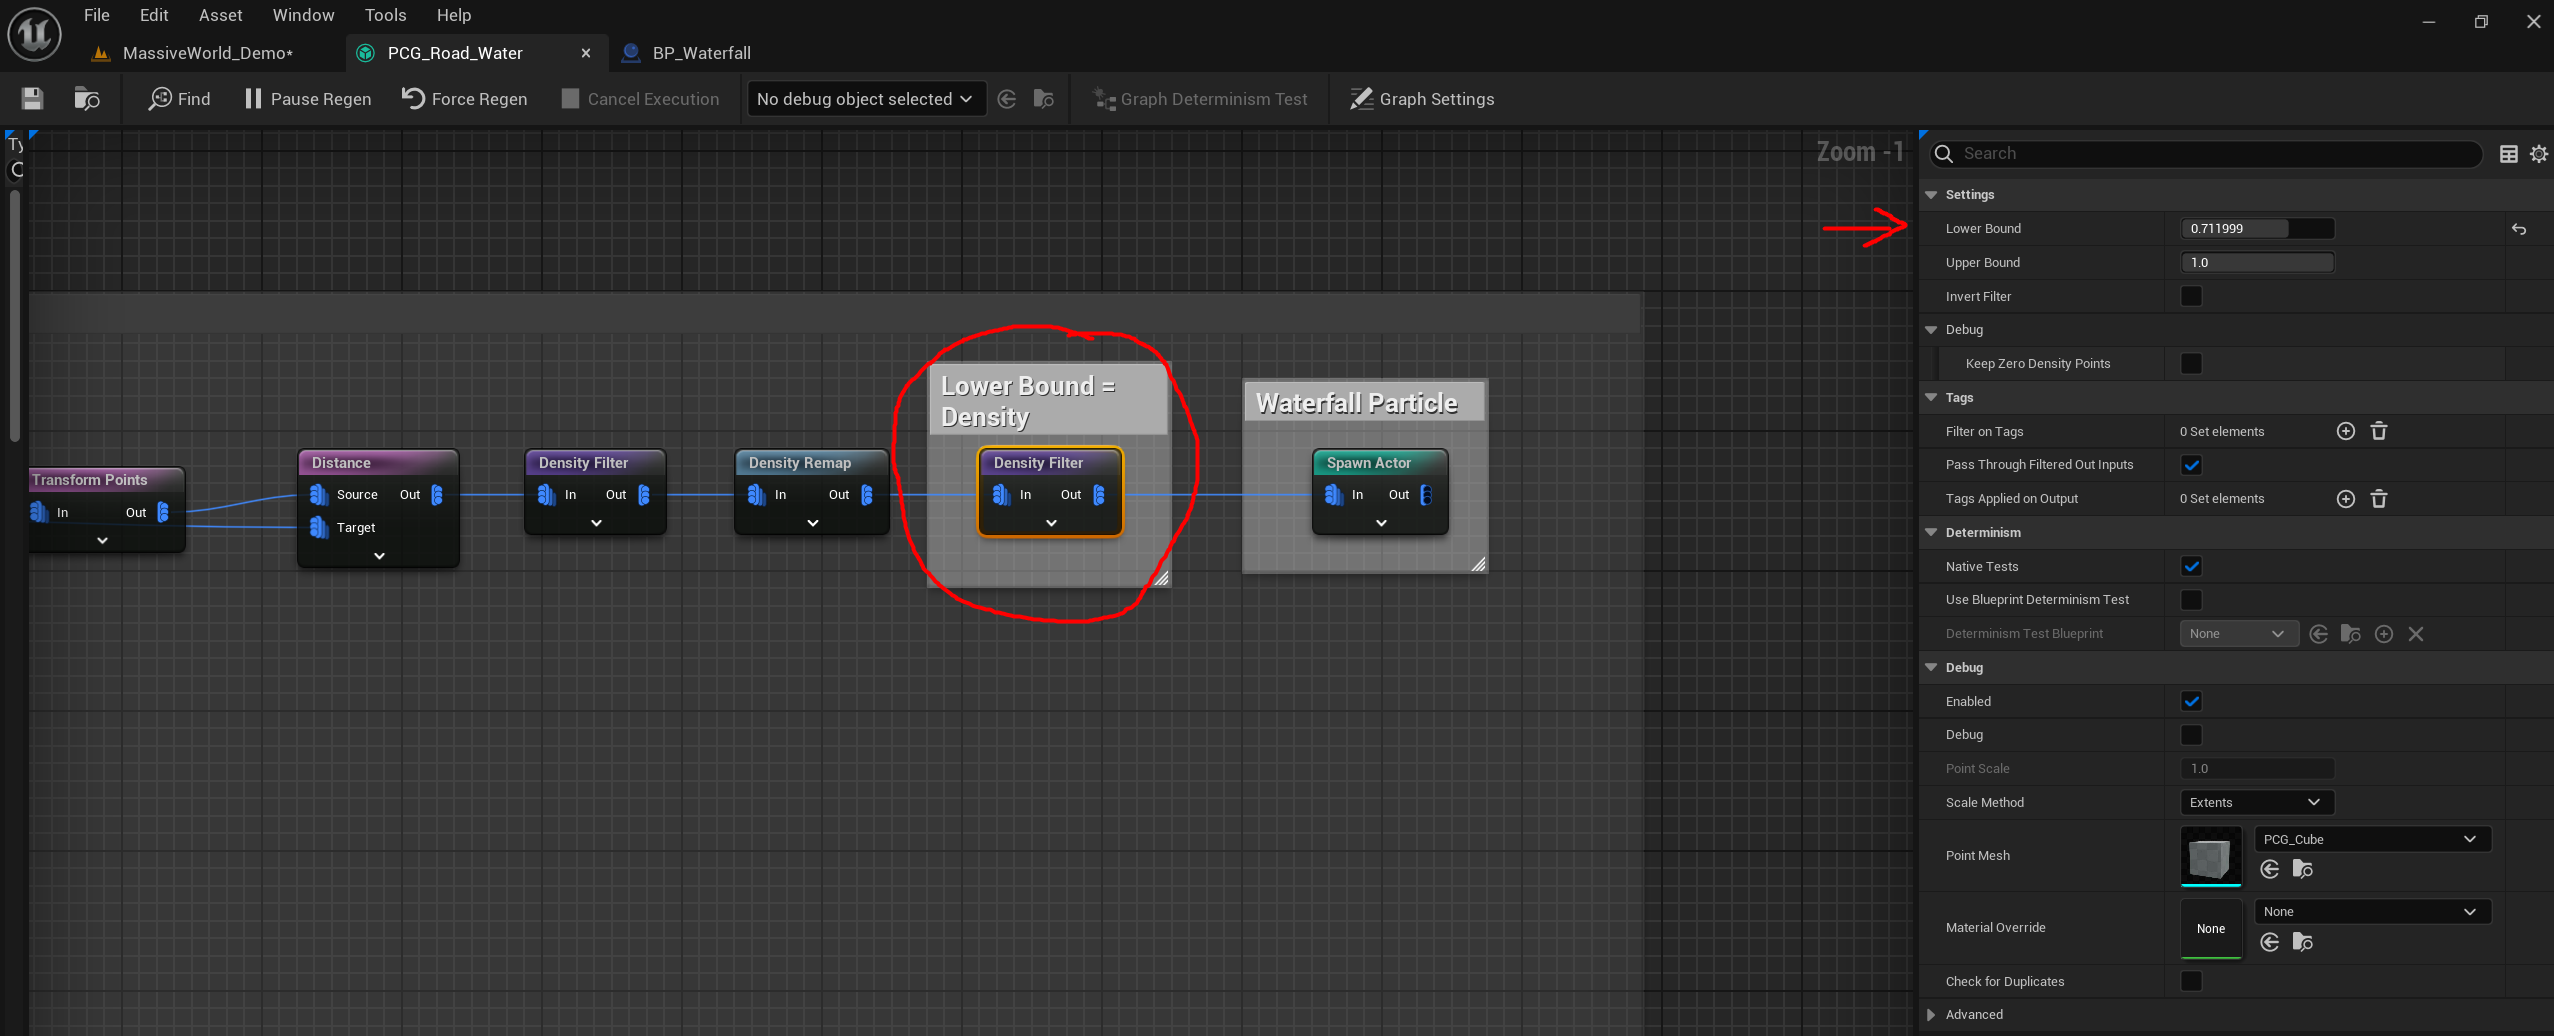
To reduce the density you can go inside the PCG\_Road\_Water and tweak the Density Filter Lower Bound.

<figure><img src="https://3223403327-files.gitbook.io/~/files/v0/b/gitbook-x-prod.appspot.com/o/spaces%2F5xsfjHEQXblHDG7WFyoC%2Fuploads%2Fjaw2YGUGdFmEpSkKIITe%2Fimage.png?alt=media&amp;token=7852c9a3-8a88-45a9-b023-e211ad30f65d" alt=""><figcaption></figcaption></figure>

The Transform Point can also be tweaked to adjust the position/rotation and scale of the waterfall effect. You can also randomize all those transforms.